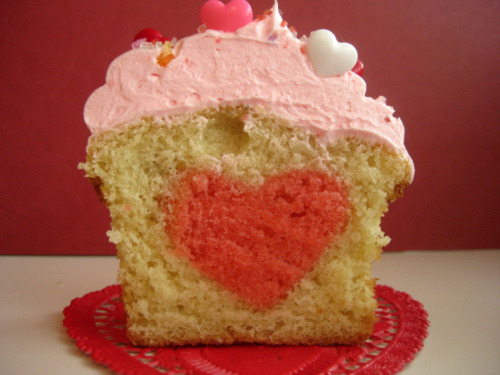
These are fantastic and fairly easy to make!!! Great for valentines day and anniversary's or a little treat for your loved ones.
You can adapt the recipe to your own acquired taste, here I'm going to give you a basic vanilla cake recipe with a buttercream cheese frosting. You can make chocolate, lemon, strawberry in fact any flavour that tickles your fancy will work with this recipe. As long as you set aside some plain cake batter to dye red for the hearts.
Ingredients
1 1/2 sticks unsalted butter
1 1/2 c. granulated sugar
3 eggs
2 t. baking powder
1/2 t. baking soda
1/4 t. salt
2 t. vanilla
2 1/2 c. flour
1 1/3 c. whole milk
For the buttercream you’ll need:
1 stick unsalted butter, room temperature
16 oz cream cheese, room temperature
2 c. powdered sugar
16 oz cream cheese, room temperature
2 c. powdered sugar
Food colouring gel if necessary
You will get 12 cupcakes from one batch of cake batter.
Here’s how you do it:
- First you will need to mark up your cupcake liners. Use a non-toxic marker or a pencil to draw a little dot on the outside of 12 cupcake liners, then place them in your cupcake pan. Set these aside.
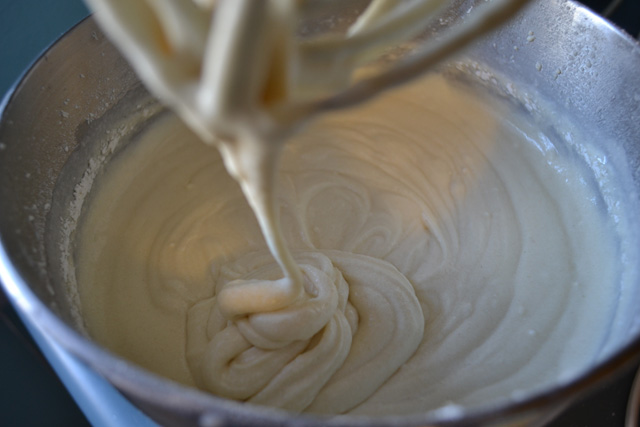
- Mix up your vanilla cake batter
- Pour a little more than 1/3 of the batter (about a cup and a half) into a smaller bowl. Add red food colouring (preferably food colouring gel) until you get your desired pink or red colour Pour the batter into a non-stick (or lightly greased) 8x8 inch baking pan and bake until the edges of the cake start to turn golden brown and a knife or toothpick inserted into the centre of the cake comes out clean (different recipes require different baking times—make sure you keep an eye on your cake).
- Allow to cool completely (to speed up the process you can stick it in the fridge).
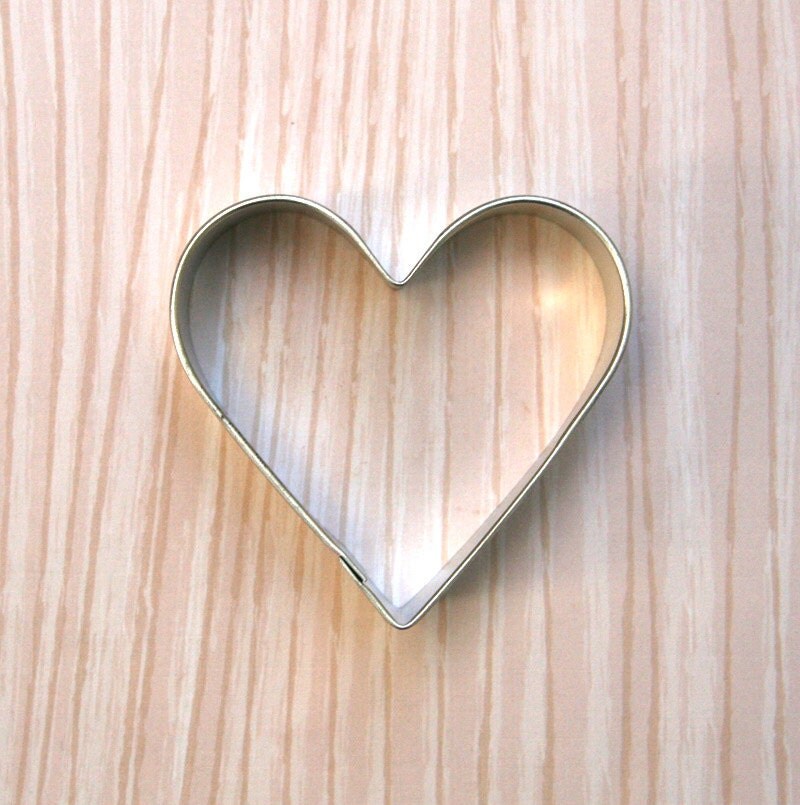
- Once the sheet cake is cool, loosen the edges away from the pan with a knife and then invert the pan onto a cutting board. Use a small heart-shaped cookie cutter to cut out a dozen cake hearts that are small enough to fit into an average-sized cupcake pan.
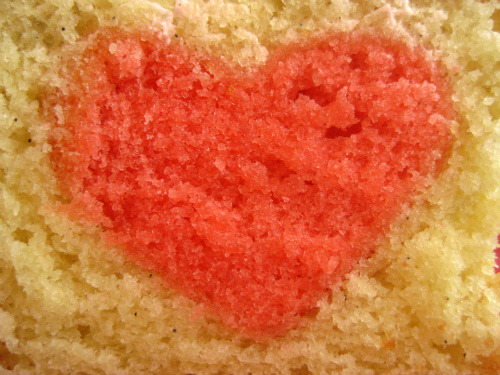
- Spoon two heaping tablespoons of the remaining batter into paper-lined cupcake tins, so they’re about half-full. Put one heart into each tin and press it point down into the batter. (Keep all the hearts facing towards the dot you drew on the cupcake paper, so you remember which way the heart is facing after the cupcakes are baked.) Cover with another heaping teaspoon of batter so the heart is completely covered and bake until the cupcakes have turned golden brown and the cake bounces back when you gently press your finger into the top of the cupcake.

- Allow the cakes to cool (place in the fridge if you are in a rush) and make your butter icing ready to frost.
- Once cooled they are ready to frost and decorate however you please :)
you’ll have to keep the cupcakes facing forward so you get the right cross-section of the heart when you cut or bite into the cupcake (to get the full heart effect). That’s where the little dot on the cupcake paper comes in handy. After frosting, put heart candy on them (or some other decoration) that can also face forward so you know which way to cut the cupcake in order to see the heart shape inside (if you cut the heart in the wrong direction you just get a rectangle shape—not very romantic!).
No comments:
Post a Comment