Saturday, 13 October 2012

Raspberry Chocolate Cookie sensation

White Chocolate Raspberry Cheese Cake Cookies


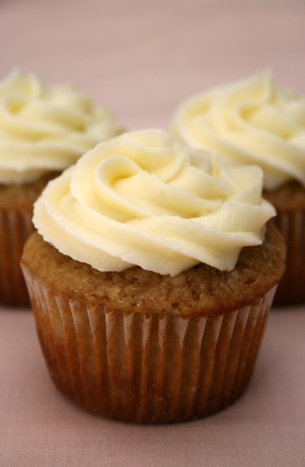
Now I don't know about you... But I love a soft flavoursome cookie. This is an absolute delight!!! It has amazing pockets of sweet raspberry mixed with the smooth creamy texture of the White chocolate. These are fabulous warm or cold. And ladies... trust me when I say it keeps those hormonal cravings at bay..Say no more LOL...

The raspberry and chocolate have a classic and timeless flavour. The family will absolutely love them, young and old. Impress your friends family and peers!!! And here is how it's done...

Ingredients 
1 1/4 cups all-purpose flour
1/2 teaspoon salt (scant)
6 tablespoons butter, softened
6 tablespoons cream cheese softened

1/2 cup sugar
1 large egg
1 teaspoon vanilla
1/2 teaspoon almond extract
1 cup white chocolate chopped finely or chocolate chips
1 cup frozen raspberries (not the ones in syrup, the ones that are flash frozen whole)


  • Preheat oven to 180 degrees gas mark 4
  • Line baking sheets with the parchment paper
  • In a small bowl, sift the flour and salt then set aside
  • In a mixing bowl, cream the butter until pale, add cream cheese and beat until light and fluffy. Add the sugar, beat until well combined. then mix in the egg and flavourings. Make sure eggs are room temp.
  • Beat in flour until just combined
  • Add chocolate and give it a good stir. Then add the frozen raspberries. Keep them frozen as its easier and means you can increase the baking time slightly. 
  • Use a medium scoop and drop onto prepared pans


Bake for 10 to 12 minutes until slightly brown around the edges

This recipe makes 16-18 cookies. 


Now wow your peeps ;)


or eat them all to yourself...thats what I did ;)  hehe


Friday, 12 October 2012

So Halloween is coming....


Hey guys...


We are soon entering into autumn and pumpkin season and a few people have asked me for ideas on cakes and bakes for Halloween. I'm going to share and show you a few pics and ideas I think will look and taste great. 


Halloween is the perfect time to get experimental in the kitchen, especially with the kiddies so get stuck in and creative with your cakes and bakes. 

Any feed back you have and comments will be much appreciated, also please do update me with pics if you manage to try any of the recipes out.


Jelly worms...really easy.. put straws in a jar and fill with jelly. this is the result


Vampire Bite cakes

Halloween Cup Cakes!!

Fondant ghoulish cup cakes

Ghost cakes#


Fondant figures on cupcakes

Black Cat Cupcake....<3


delicious cup cakes 19

Simple stencil cake

Spider cake! halloween


Oreo RIP cakes

Cookies & Cream Cupcakes


Simple spider webs

Easy spider web cupcakes. Perfect to send for Macklin's Halloween party!


Chocolate skull cakes 

Skulls

Frankenstein Cookies 

#Frankenstein #Cookie Looking totally awesome! We love and had to share! Great CakeDecorating! Great #Halloween ideas!


L


L

More on the way....


White winter Chocolate Brownies


White Chocolate Brownies

White chocolate brownies. Oh my word. **

These Brownies are like nothing your taste buds have experienced before. With an almost fudge consistency but cake like texture anybody you present these to will be impressed. Here's how you make them~

Ingredients
2 (5 oz. each) bars white chocolate
1/4 cup butter
1/2 cup sugar
1/8 teaspoon salt
2 eggs
1 teaspoon vanilla
1/4 teaspoon almond extract
1 cup flour
1/4 teaspoon baking powder
GLAZE:
1 oz. semisweet chocolate
1 teaspoon shortening (shortening is any type of fat that's solid at room temp...i.e Lard)

  • Grease a 9-inch baking pan. 
  • In saucepan over low heat melt butter and 1 bar white chocolate, stirring until well blended.
  • In large bowl, combine sugar, salt and eggs and beat at highest speed of mixer for about 4 minutes. 
  • Reduce speed to low and add melted candy bar mixture and extracts. 
  • Sift together flour and baking powder, stir into chocolate mixture till just combined. Break up other chocolate bar and stir in.
Bake in a preheated 350°F oven for 25 to 30 minutes. Melt glaze ingredients together and drizzle over cooled brownies.

Makes 32 brownies.

If you want to add a wow factor to your brownies white not add some chocolate chips or coloured sprinkles. The brownie recipe works well with lots of variations and diversity so get experimenting guys 


BEST SERVED WARM... MMMMM


Enjoy xxxx

Banana Cupcakes with Cream Cheese Icing


Banana Cupcakes with Cream Cheese Icing

photos-69272670621

I don't know about you but I absolutely LOVE moist banana cake. Especially with a complimentary cream cheese frosting. The combination of vanilla, cinnamon and banana in the cake taste 
amazing together… And the aroma that will fill your house as they came out of the oven freshly baked is incredible.

If you're not too keen on walnuts you can top your cupcakes with 
caramel banana slices. I will explain how to do this at the bottom of 
the blog.

Ingredients

Makes 12

125g butter, softened
3/4 cups brown sugar
2 eggs
1 tsp vanilla extract
1/4 tsp ground cinnamon
2 ripe bananas, mashed
1 1/2 cups self-raising flour
100ml milk
Walnuts (optional)


Cream Cheese Icing
30g butter, softened
125g cream cheese, softened
2 cups icing sugar

Preheat oven to 160C

  • Cream the butter and sugar together until fluffy. Beat in the eggs one at a time (works best with eggs at room temp), and add the vanilla and cinnamon. 
  • mash up the bananas and then Beat the bananas into the mixture. 
  • Sift the flour and gently fold into the mixture, alternating with the milk.
  • Spoon into 12 prepared cupcake cases and bake for 15-20 minutes* until a toothpick inserted into the middle comes out clean. keep an eye on the cakes as cooking times vary depending on cooker and conditions 
  • To make the icing: Beat the butter until fluffy and pale. Add the cream cheese and beat well, and slowly add the icing sugar until the icing is thick and creamy.
  • When the cupcakes are cool spoon or pipe a fair amount of icing onto each cupcake and top with a walnut.
Note: Don't refrigerate these cupcakes! eat them at room temperature because they will dry out  If you plan to eat them a day or two ahead, leave the icing to the last minute and keep the icing in the fridge.


For the caramelised Bananas to top:

1-2 bananas
2 -4 tablespoons granulated sugar (or more)
cooking spray (regular or butter flavour)


  • Slice bananas into thick coins or lengthwise strips, depending on your preference.
  • Pour sugar onto a plate. Roll bananas in sugar, until completely coated.
  • Spray a medium size nonstick pan, and heat over medium high heat. Add bananas and sugar.
  • Cook bananas until light to golden brown underneath, about 4-5 minutes (you can lift with a spatula or fork to peek). Be careful not to overcook or burn them (if you smell them browning, or see color in the pan, flip them right away). Keep in mind these times will vary, depending on your stove.
  • Gently flip bananas over to brown other side, turning heat down to medium. The second side will brown in about one minute.
  • Transfer to a plate that has been coated with cooking spray (otherwise they may stick - they are ooey gooey and sticky!) and serve.
Easy Caramelized Bananas. Photo by 2Bleu
  • Soak pan in hot water to facilitate cleaning.


Thursday, 11 October 2012

Cakes with a Big Heart...Literally

Bake a heart in a cupcake


These are fantastic and fairly easy to make!!! Great for valentines day and anniversary's or a little treat for your loved ones. 

You can adapt the recipe to your own acquired taste, here I'm going to give you a basic vanilla cake recipe with a buttercream cheese frosting. You can make chocolate, lemon, strawberry in fact any flavour that tickles your fancy will work with this recipe. As long as you set aside some plain cake batter to dye red for the hearts.

Ingredients

1 1/2 sticks unsalted butter
1 1/2 c. granulated sugar 
3 eggs
2 t. baking powder
1/2 t. baking soda
1/4 t. salt
2 t. vanilla 
2 1/2 c. flour
1 1/3 c. whole milk 


For the buttercream you’ll need:
1 stick unsalted butter, room temperature
16 oz cream cheese, room temperature
2 c. powdered sugar 
Food colouring gel if necessary 


You will get 12 cupcakes from one batch of cake batter.

Here’s how you do it:
  • First you will need to mark up your cupcake liners. Use a non-toxic marker or a pencil to draw a little dot on the outside of 12 cupcake liners, then place them in your cupcake pan. Set these aside.
  • Mix up your vanilla cake batter 
  • Pour a little more than 1/3 of the batter (about a cup and a half) into a smaller bowl. Add red food colouring (preferably food colouring gel) until you get your desired pink or red colour  Pour the batter into a non-stick (or lightly greased) 8x8 inch baking pan and bake until the edges of the cake start to turn golden brown and a knife or toothpick inserted into the centre of the cake comes out clean (different recipes require different baking times—make sure you keep an eye on your cake).
  • Allow to cool completely (to speed up the process you can stick it in the fridge).
  • Once the sheet cake is cool, loosen the edges away from the pan with a knife and then invert the pan onto a cutting board. Use a small heart-shaped cookie cutter to cut out a dozen cake hearts that are small enough to fit into an average-sized cupcake pan.


  • Spoon two heaping tablespoons of the remaining batter into paper-lined cupcake tins, so they’re about half-full. Put one heart into each tin and press it point down into the batter. (Keep all the hearts facing towards the dot you drew on the cupcake paper, so you remember which way the heart is facing after the cupcakes are baked.) Cover with another heaping teaspoon of batter so the heart is completely covered and bake until the cupcakes have turned golden brown and the cake bounces back when you gently press your finger into the top of the cupcake.

  • Allow the cakes to cool (place in the fridge if you are in a rush) and make your butter icing ready to frost.
  • Once cooled they are ready to frost and decorate however you please :)

Note
you’ll have to keep the cupcakes facing forward so you get the right cross-section of the heart when you cut or bite into the cupcake (to get the full heart effect). That’s where the little dot on the cupcake paper comes in handy. After frosting, put heart candy on them (or some other decoration) that can also face forward so you know which way to cut the cupcake in order to see the heart shape inside (if you cut the heart in the wrong direction you just get a rectangle shape—not very romantic!).

When you cut into the cupcake it should look like this...


Wednesday, 10 October 2012

Homemade Vanilla Extract

Homemade Vanilla Extract


For those who bake a lot you will know where I'm coming from when I say Vanilla extract is a pain in the behind. 
First of all vanilla extract is not cheap! :(
Secondly It also runs out pretty quick.
Thirdly most recipes require it... cakes, cookies, morning pastries, and even ice cream.

So why not invest in making and storing your own. It's actually pretty easy, however it does require a bit of time to 'marinate' so to speak, for this reason it's best to make your batches in advance.

Here's how its done...

You will need

  •  A Glass jar or bottle with a lid to seal. (Be sure to sterilise this with boiling hot water before use).
  • Vodka - enough to cover the beans in the bottle you choose. You can also use rum or other neutral flavoured alcohol.
  • Vanilla Beans – The amount you use will depend on the size of the jar you make, but you want to use a bunch to get the best flavour. I used about 18 beans in 750ml of vodka. The beans can be expensive, so you can also keep the pods after you have scraped out the seeds for another recipe. This will take longer, because you aren’t adding the flavorful pulp, but it is a great way to use the pods. I add one to the bottle every time I have another pod. 


  • Clean your bottle and dry it well.
  • If you are using the whole vanilla beans, scrape out the pulp of a bunch of beans.

vanilla extract

  • Put the pod and scraped pulp into the bottle. (Scraping out the pulp first will help it flavour the alcohol quicker.)

  • Once you have all the beans scraped and added to the bottle…

  • Pour the vodka into the bottle. You can use a Funnel to make sure you don’t spill.

  • Close the stopper / lid on the jar/bottle and shake the vanilla and vodka to distribute the seeds.

  • The vodka will still be clear for the first few days. Once every couple of days give the extract a good shake to break up the pulp and get the seeds distributed in the vodka.
vanilla extract
  • After a week the extract will start to get darker and develop some flavor. After two weeks you can use the extract, but the flavor will be very subtle.
  • At week 3 the color should be amber and the aroma is richer, but waiting for week 4 or 5 is when it gets really exciting. Use it in any recipe that calls for vanilla extract. If you are using it in buttercream, you may want to strain out any of the pulp. You will still have the seeds in your recipe, but any of the stringy bits from the pod will get strained out.

The extract can be kept indefinitely and over the months it just keeps getting better.

Enjoy xxx


http://zoebakes.com/2012/01/03/homemade-vanilla-extract/

Healthy Low calorie Chocolate Muffins


Triple Chocolate Muffins
Servings: 12 Big Muffins or 24 Smaller Muffins
Calories: 116 Calories Per Muffin or 58 Calories Per Muffin 
lessthan300kcal:

Triple Chocolate Chunk Muffin Knock-Offs of Whole Food’s 6 Dollar per 4 Chocolate Chunk VitaTop Muffins
Ingredients:
1 3/4 c oats
 3 egg whites
 3/4 cup unsweetened cocoa
1/2 cup unsweetened applesauce
1 tsp. vanilla extract
1/2 cup plain Greek yogurt (or regular plain low fat yogurt)
1/2 tsp cream of tartar (or 1-1/2 Tbsp. vinegar)
1-1/2 tsp. baking powder
1-1/2 tsp. baking soda
1/4 tsp. salt
1 cup hot water
1 cup sugar substitute (like Splenda granular) OR 1/4 cup + 2 tbs stevia
1/2 cup semi-sweet chocolate chips (or use white chocolate or peanut butter chips!)
Preheat oven to 350 degrees. Line 2 (12-cup) muffin pans with foil cupcake liners, or spray muffin tin with non-stick cooking spray. Set aside.In a blender, (or food processor), mix all of the ingredients together, except for the chocolate chips. Blend until oats are ground and mixture is smooth.Place mixture in a bowl and gently stir in 1/2 of the chocolate chips (set the rest aside). Scoop mixture into prepared muffin pans.Place muffins tins in the oven for 10 minutes.  After 10 minutes, remove muffins from the oven (but don’t shut oven off), and distribute the other half of the chocolate chips on top of each muffin.Place  the muffins back into the oven and bake for an additional 2-5 minutes, or until a toothpick comes out clean. *Note, you could skip this step by putting all of the chips in the batter, and baking the muffins for 12-15 min straight, but this method gives the muffins the traditional ‘VitaTop Muffin’ look with the chocolate chips on top!Cool muffins before removing from pan. ENJOY!!! Servings: 12 Big Muffins or 24 Smaller MuffinsCalories: 116 Calories Per Muffin or 58 Calories Per Muffin 
*drooling*
THERE HAS BEEN SUCH WONDERFUL FOOD ON MY DASH
absolutely love this recipe!!! How much better can it get, a yummy triple chocolate muffin without the guilt. These muffins are so delicious you would never believe they are only 58 calories!!! So creamy and mouthwatering I had to share.
Try it yourself for a yummy chocolate guilt free delight ;)
Ingredients:
1 3/4 cups oats
 3 egg whites
3/4 cup unsweetened cocoa
1/2 cup unsweetened apple sauce
1 tsp. vanilla extract
1/2 cup plain Greek yogurt (or regular plain low fat yogurt)
1/2 tsp cream of tartar (or 1-1/2 Tbsp. vinegar)
1-1/2 tsp. baking powder
1-1/2 tsp. baking soda
1/4 tsp. salt
1 cup hot water
1 cup sugar substitute (like Splenda granular) OR 1/4 cup + 2 tbs stevia
1/2 cup semi-sweet chocolate chips (or you can use white chocolate)
  • Preheat oven to 350 degrees. Line 2 (12-cup) muffin pans with foil cupcake liners, or spray muffin tin with non-stick cooking spray. Set aside.
  • In a blender, (or food processor), mix all of the ingredients together, except for the chocolate chips. Blend until oats are ground and mixture is smooth.
  • Place mixture in a bowl and gently stir in 1/2 of the chocolate chips (set the rest aside). Scoop mixture into prepared muffin pans.
  • Place muffins tins in the oven for 10 minutes.  After 10 minutes, remove muffins from the oven (but don’t shut oven off), and distribute the other half of the chocolate chips on top of each muffin.
  • Place  the muffins back into the oven and bake for an additional 2-5 minutes, or until a toothpick comes out clean. *Note, you could skip this step by putting all of the chips in the batter, and baking the muffins for 12-15 min straight, but this method gives the muffins the traditional ‘VitaTop Muffin’ look with the chocolate chips on top!
  • Cool muffins before removing from pan. 

And Viola time to enjoy!!!